I have been saving this giant piece of corrugated cardboard for maybe a year, since I bought my standing desk.
Last year sometime I framed some collages on one side of the box. Last week, as part of my lockdown-induced cleanse I finally pulled it out from its hiding place behind the shelf, and now I have put down one layer of a new collage work. It’s nice to work so big, but boy it took a whole 200ml container of PVA (gonna buy more now).
I’m inspiring myself from some of the ephemera series, which I did around 2008. Three of them are hanging in my bedroom right now.
This is the first layer. I am confident that it will not look like this for very long. It’s around 110 x 150cm.
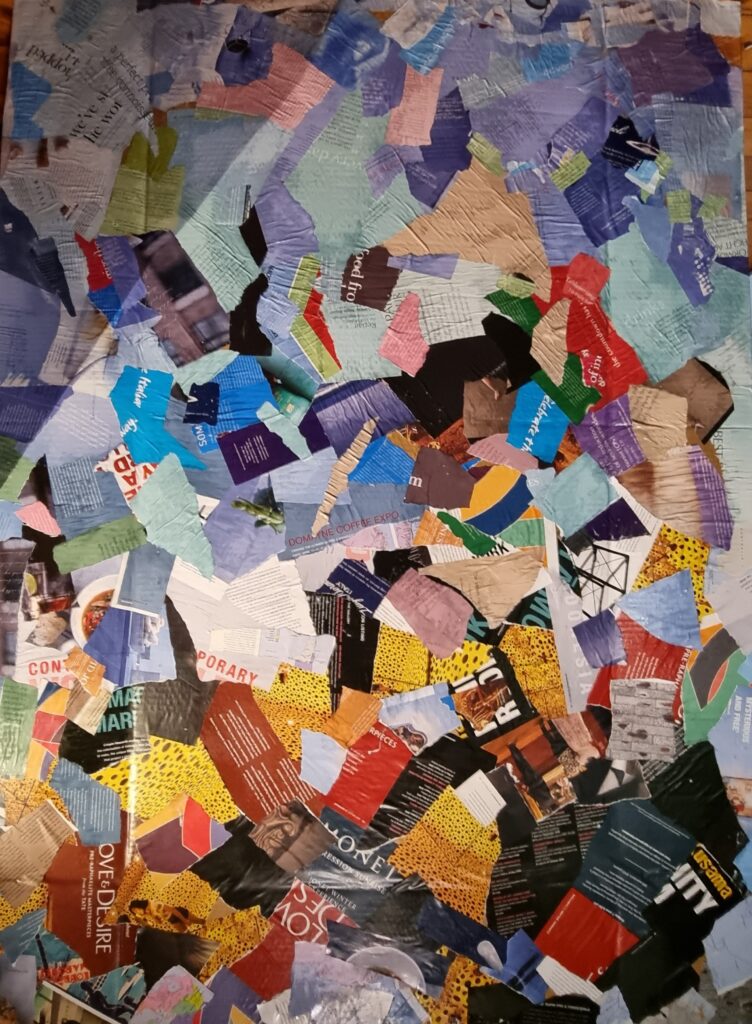
Here’s layer 2. it’s mostly navy red white yellow tissue paper. i mostly used the lighter stuff on the lighter end of the board, but i’m not sure if that was a good choice – just a choice. i was frustrated that the tissue paper tends to tear in predictable / samey ways. i suppose if i wanted to i could put a few through the cricut and make actual shapes (or less predictable shapes). Mostly bothered by the red “boot” that emerges in the middle. that’s getting knocked back in the next iteration, certainly. i didn’t start out doing tissue layers, i tried doing a glaze first – pulled out my acrylics for the first time in years. but the magazine pages at the base were all shiny coated, and the glaze didn’t take. I remembered that it was about the tissue differentially soaking up the glaze which made the other ones unpredictable. so here goes, a layer of tissue.
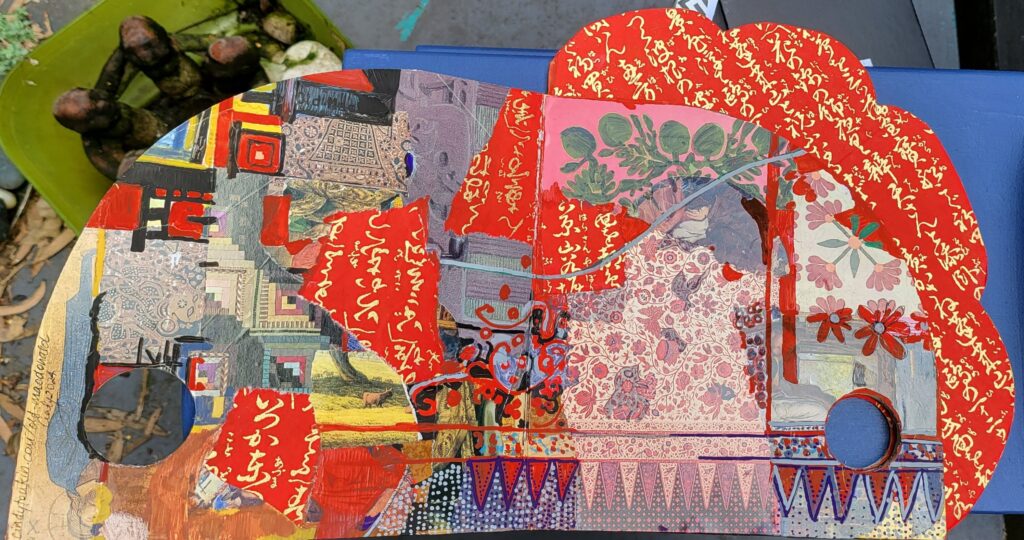
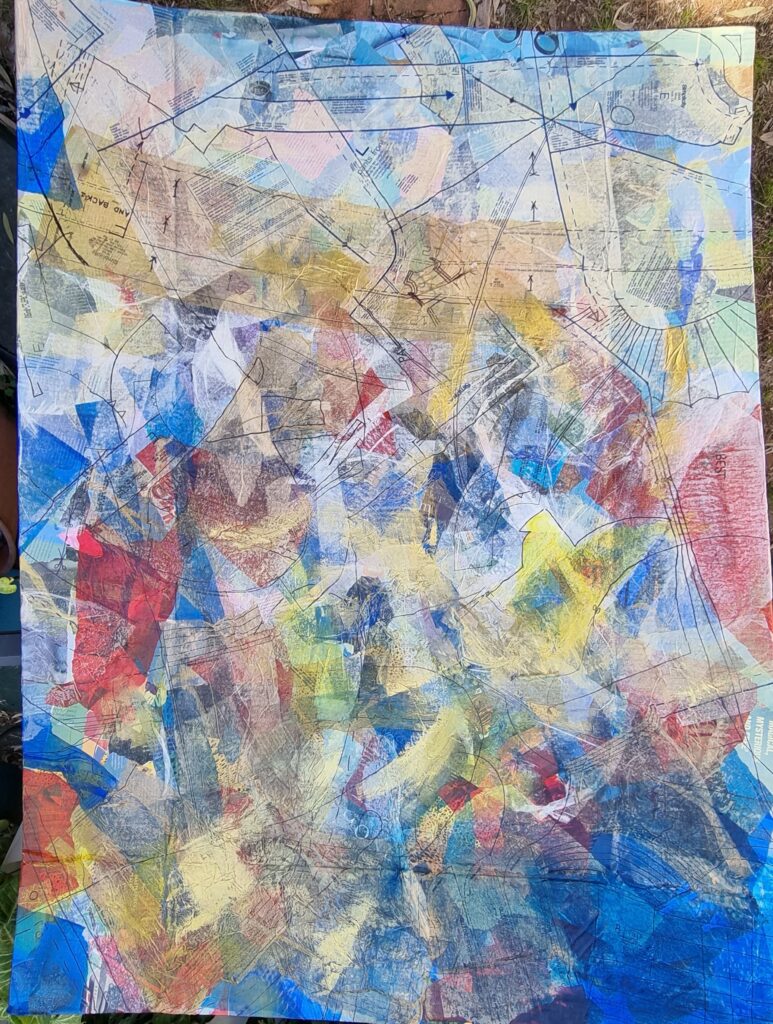
And layer 3: this is white and buff coloured dress makers patterns, which adds another layer of complexity and lines to the mix. the boot has gone, but i do like the occasional bright red which peeks through. it’s hard for me to leave bits uncovered, but it’s easy for me to leave it half done, so as long as i leave it half done with a few bits peeking out, there shall be red bits. was delighted to find a few white patterned dresses. i bought 10 or maybe even 20 patterns at a salvation army shop in marrickville around 2008, and i’ve been miserly with using them. but i forgot how great they look, and since i’ on a quest to use every bit of everyrhing (or pass it on to the bin or another artist), here we go.
as a side note, was disappointed to find one dress pattern which wasn’t lined in any way – i guess it is probably vintage and i’m silly to ccut it out – it has tiny holes cut into it (i assume for the same reason the later patterns have tiny circles, for darts or such. I didn’t use it in this iteration, but i might use it another time. and now I have to add to my list the idea of just cutting tiny holes into a few layers of tissue, using the cricut, since i don’t mind if it tears, because it’s purely to have some variety in tissue size.
this layer my concerns are that the arrows are quite large and insistent, and there’s a big stripe of buff that runs parallel to the top of the piece. but i know, like with the boot, it will disappear in the next layer (if i want it to). the point of this kind of piece is its unpredictability, the room for serendipity. I know the last time I did these I worked into them till they got really dark, and based on what i see in the pieces hanging in my room i then collaged new bits of light and used a gold poster pen to create light where there was none.
Since then i saw the pieces in chicago art institute where klee? one of his contemporaries? had drawn a face or a still life in the centre of a busy complex piece like this to make it into somehting – but it’s all about the background. i know i could always layer some chairs over the top as a line drawing, that has worked for me, or a single letter (the giant “g” i did which gina took home).
we’ll see what happens

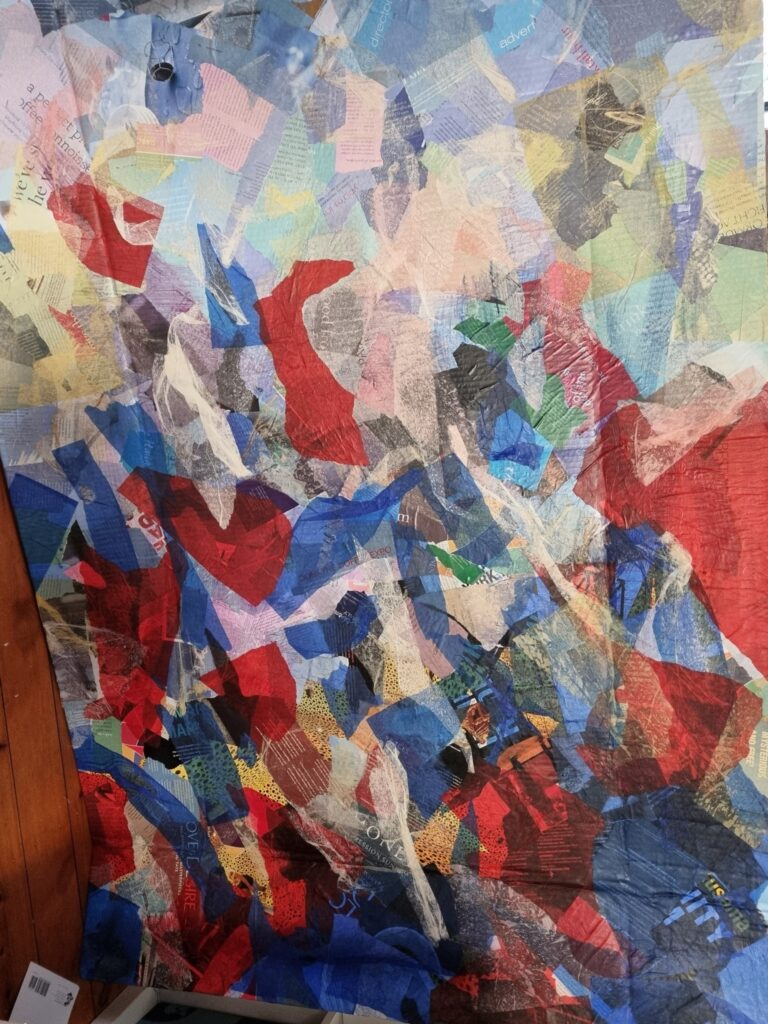
Layer 4: I used a black sharpie to extend some of the existing lines from the dress patterns and then brought in some gold and yellow. My memory of the other pieces was that i ended up with a lot of green when i introduced yellow, but without the yellow i couldn’t get any orange, which is delightful. also the grey-green, i.e. when red, yellow and dark blue meld, was exciting. so i’m going carefully, but also thinking i can’t break it. Also for this one i carried the collage outside in the sun (all of the others were taken inside the studio) and this makes a difference to the level of detail that you can see in them! For consistency I am photographing the piece with the light at the top and the dark on the bottom, but we’ll see how that goes. Because it’s a big corrugated cardboard box/lid and the sides of the lid are bending inwards, i’ve just rescued a long piece of cardboard from the bin to attach to the back of the piece with some gaffa tape. when it’s wet the old bends come back in, and that’s going to haunt me for the life of the piece, so correcting now is a good idea i think!
Layer 5 or so: I did a test layer of some Sondheim lyrics using a watercolour marker – just a few – i’ve made a few templates for a Sondheim piece, and this had worked out well on other things.
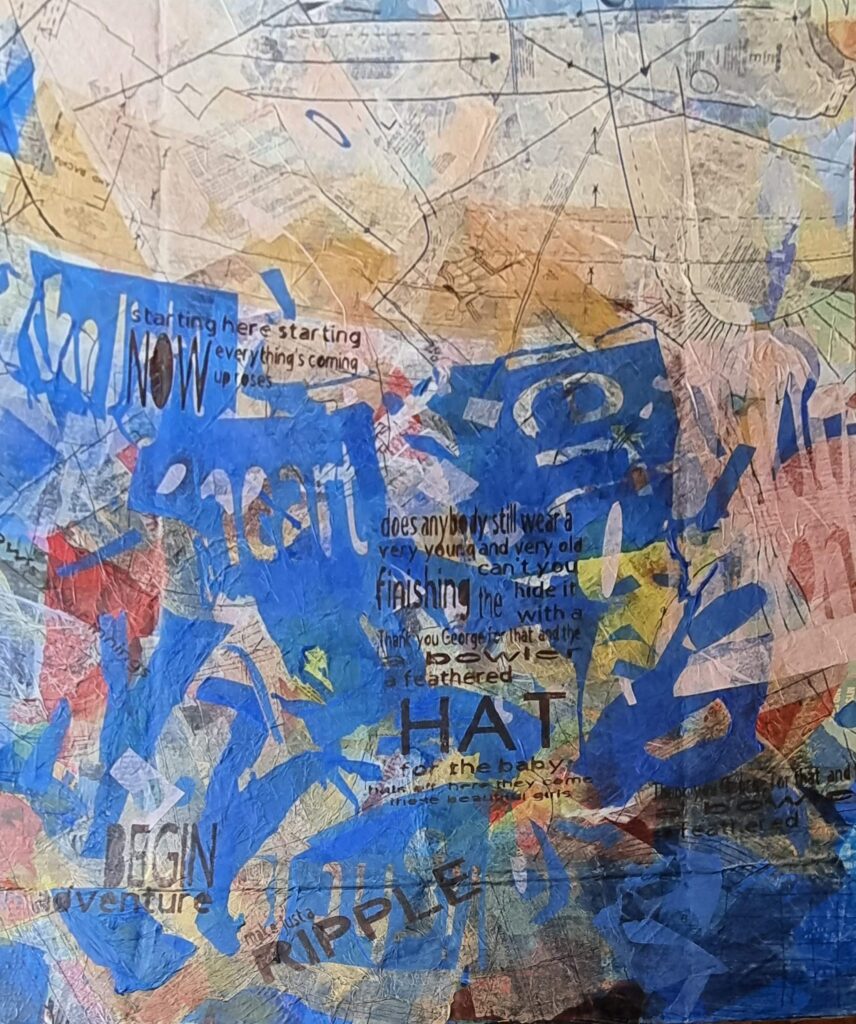
Layer 6?: i discovered that layering with ink on a paint brush worked well, gave a nice texture and so i went a little crazy. I used the templates I had – especially like the one I made using the women’s names from Mack the Knife (Sukey Tawdry, Lotte Lenya, Jenny Diver, Lucy Brown). I do’nt think i’ve finished whatever piece i did that used that template, but i have now used it here. Also used a little of the Bellbirds template and a Sondheim one I did about the hat (not yet posted here, but in progress).
I’m hanging it in my lounge room for a while to decide if it’s done. I added in a few coloured paint drawn templates, because i liked what the turquoise / brown / orange looked like on the bottom RH corner.